

How To Make Professional Looking Cakes
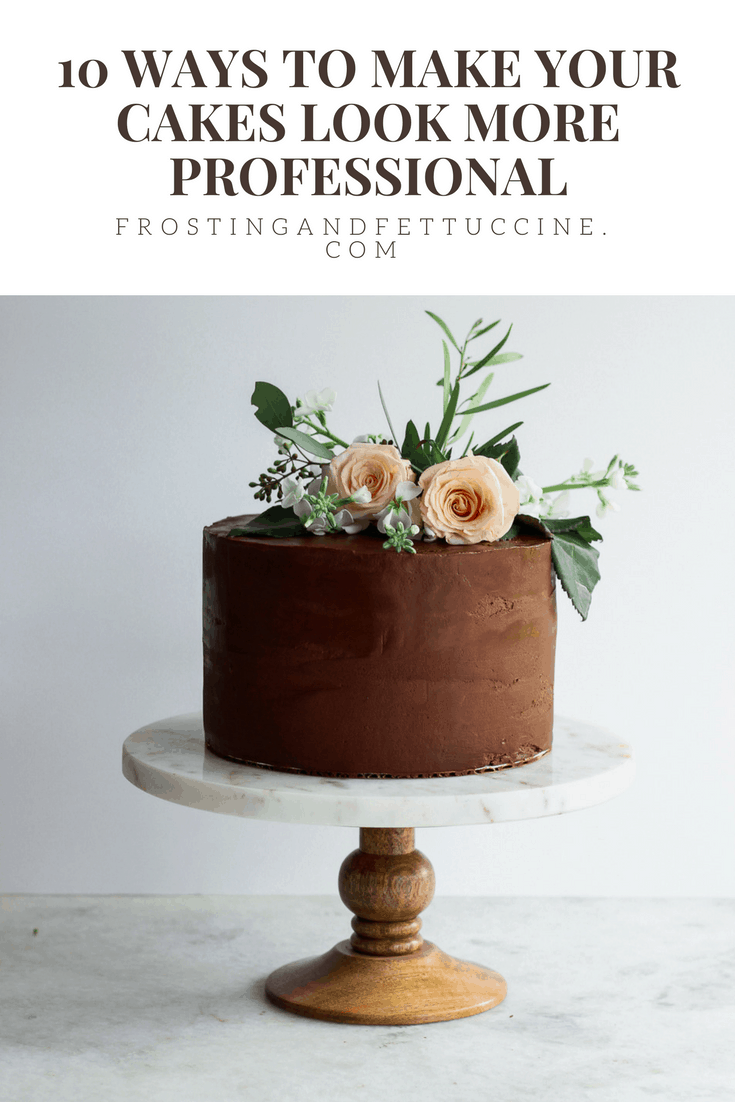
Learn how to frost a cake with these x easy steps! Yes even if you are a beginner, you tin can learn how to decorate a cake from kickoff to cease similar a pro!
We've all seen those beautiful cakes.
Y'all know the ones I'm talking about. The ones that are even and smooth and beautifully decorated. Those ones with the straight edges, and the sprinkles put in just the right place and wonder how do they do it!?
BEEN THERE. Actually was there for a while, but I fabricated it out alive and I'm here to give you my top ten tips to brand your cakes wait more professional!
How to decorate a block to wait more professional person
In the beginning of my cake decorating days I was mesmerized with how block could be decorated in and so many dissimilar means. I wondered how to stack my layers and how the frosting always looked and then fifty-fifty. Only generally, I was wondering why the hell couldn't my freaking cakes look the same!
At present, after pastry schoolhouse and 10 years of cake decorating experience, I am here to share my tips and tricks on how to start making your cakes wait amend.
Maybe yous want to commencement your ain cake business and know nothing. Or, you like to decorate cakes as a hobby. Maybe you desire to impress your in-laws. Whatever the reason, here are your basic starting points for making your cakes more professional person.
Disclaimer: There are definitely means (see beneath) to decorate beautiful cakes without special cake tools, just your cake life will be much easier if you have:
- An kickoff spatula like this
- A bench scraper similar this
- A cake turn table like this
Let's outset and learn how to decorate a cake!
First bake your cake into 3 layers

Usually when people make layer cakes they are always made in 2 cake pans which equals two cake layers duh.
When I first started out, I couldn't understand why my cakes didn't expect like the ones in the magazines, and it was because my cakes weren't tall plenty!
Depending on what cake recipe you are using, this may mean that you accept to double upward the recipe. A more professional looking cake = a tall cake, so double up!
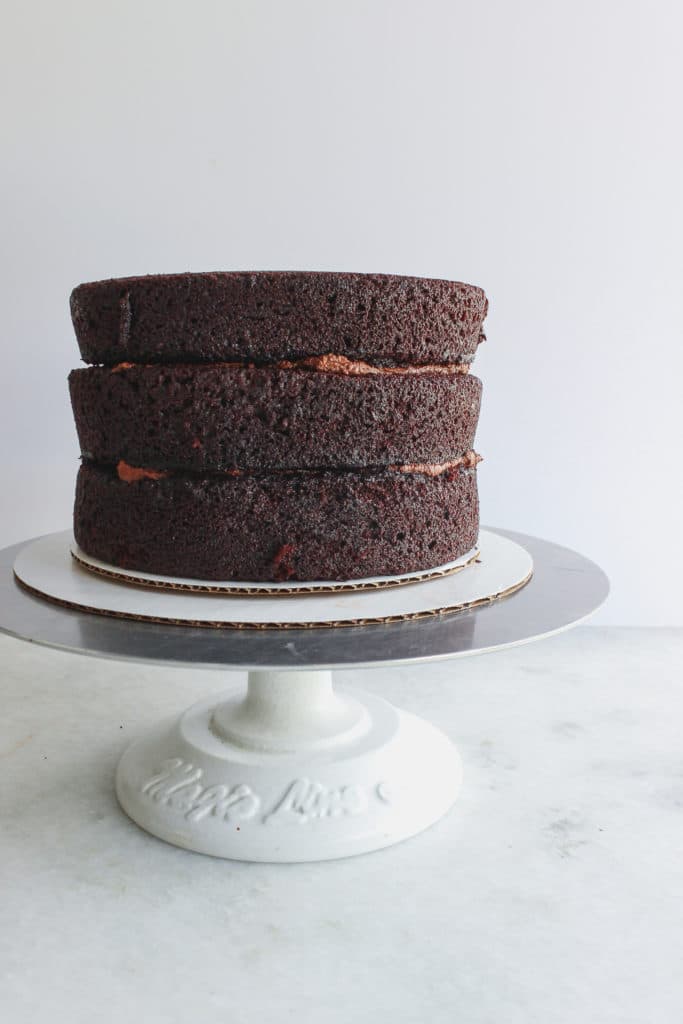
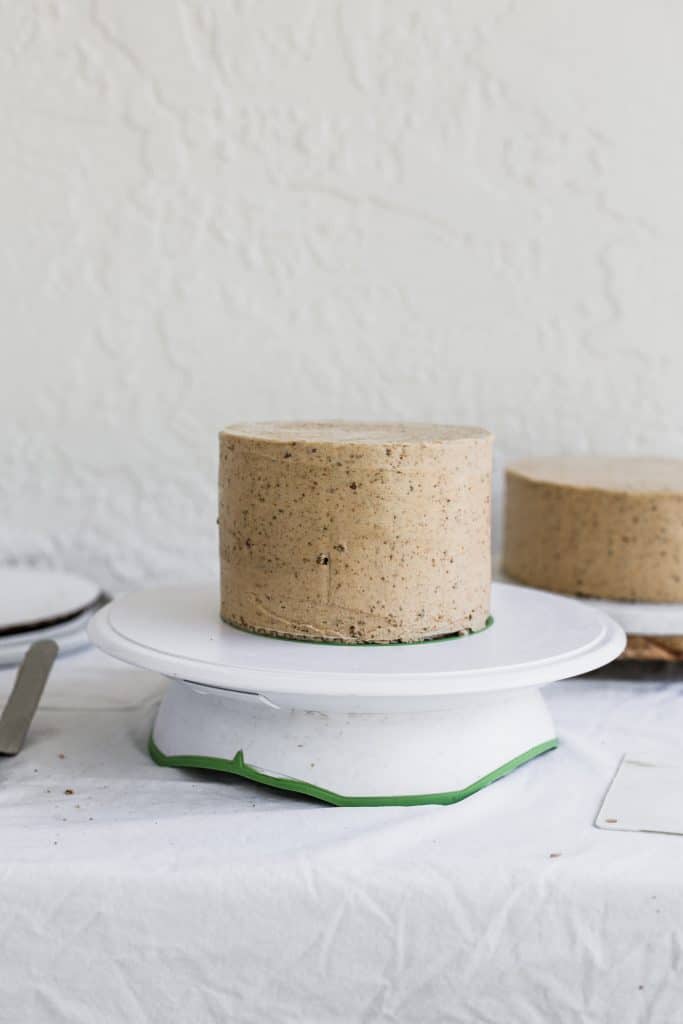
I use a standard of three cake layers in my tiers. When combined with the buttercream they end up existence 5"-5.5" tall. And so this i cake has 3 layers, and is ane tier tall at a acme of 5″ total.
To exist articulate- a cake tier is combined of cake layers. No, layers and tiers are not the same matter.
A block tier is compiled of cake layers.
Adjacent level off the block tops
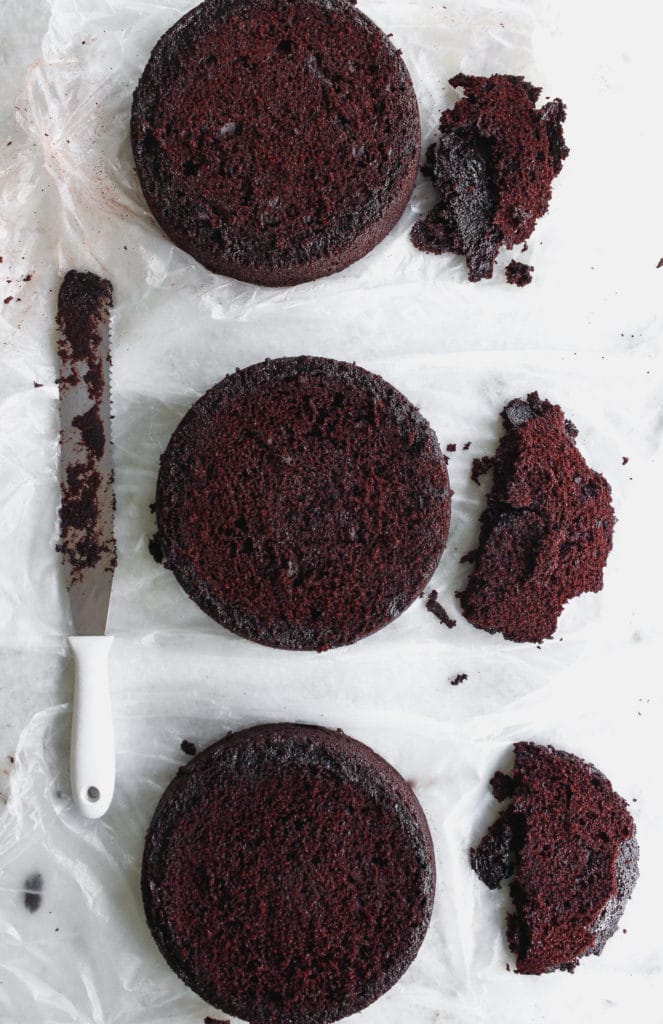
A flat cake is a heck of a lot easier to stack than a cake that has a dome top, and so yous need to level it off.
You can take a sharp, long, serrated knife and evenly, with the blade apartment, offset at the lowest part of the dome. Slice through in a push and pull move (like slicing a bagel apartment).
Make sure to keep the blade at the same level throughout the whole cutting or it will finish upward lop-sided.
A keen play tricks is to leave the cake in the pan, and once its cooled, place the flat side of the blade of tiptop of the pan and apply it every bit a guide to hack off the top.
This method works well if the whole surface area of your cake broiled higher than the pan.
Optional: stuff your face with the cake tops or pawn them off on someone else.
Cake boards
Cake board volition make your cake decorating life easier, especially if you lot are transporting the cake.
You tin can for sure decorate a cake on the stand you are serving information technology on, merely if you lot program on moving the cake around a bit you need block boards.
For one regular cake I use 2 block boards.
One that is the same size as the cake that goes directly on the bottom of the cake. And a second one that is at least 2 inches bigger so that I can decorate and move the cake around if I need to without messing up the bottom.
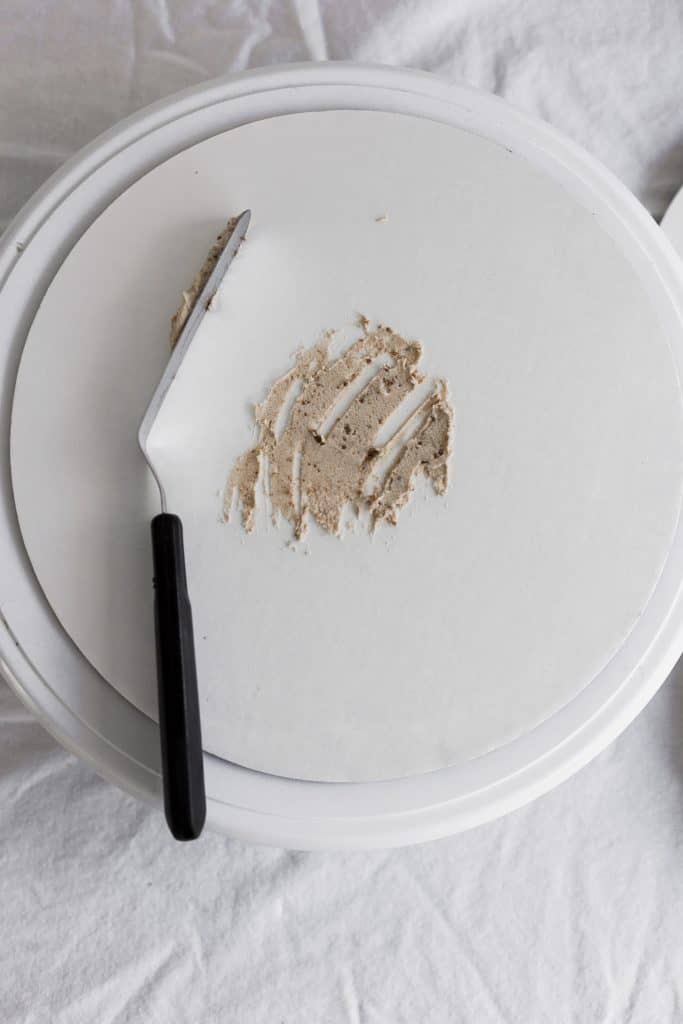
Dab the frosting
Now you lot should take 3 flat cake layers.
To first, accept a small corporeality, similar a teaspoon size, of frosting and smear information technology in the centre of the bigger cake board.
Lay the smaller cake board centered on top of the bigger one.
Identify another small amount of frosting on the smaller block lath, merely spread it effectually more than evenly- the offset spatula works wonders for this.
Now, identify your thickest (lets be honest here, the cakes might not be the exact aforementioned size even if we endeavor our hardest) block layer down on the cake board.
Tada! You but did magic- Now the cake won't slide effectually while your stacking and icing information technology.
Filling and Stacking
Ok mayhap this is two things but they go together and then I'yard keeping it that way.
Once you have your commencement cake layer secured onto your cake board its time for the frosting or buttercream.
Some people use a piping bag so they know they are 100% getting even amounts of frosting between the layers. I however, exercise non have the patience for using and cleaning another tool, and am lazy, so I just apply my offset spatula.
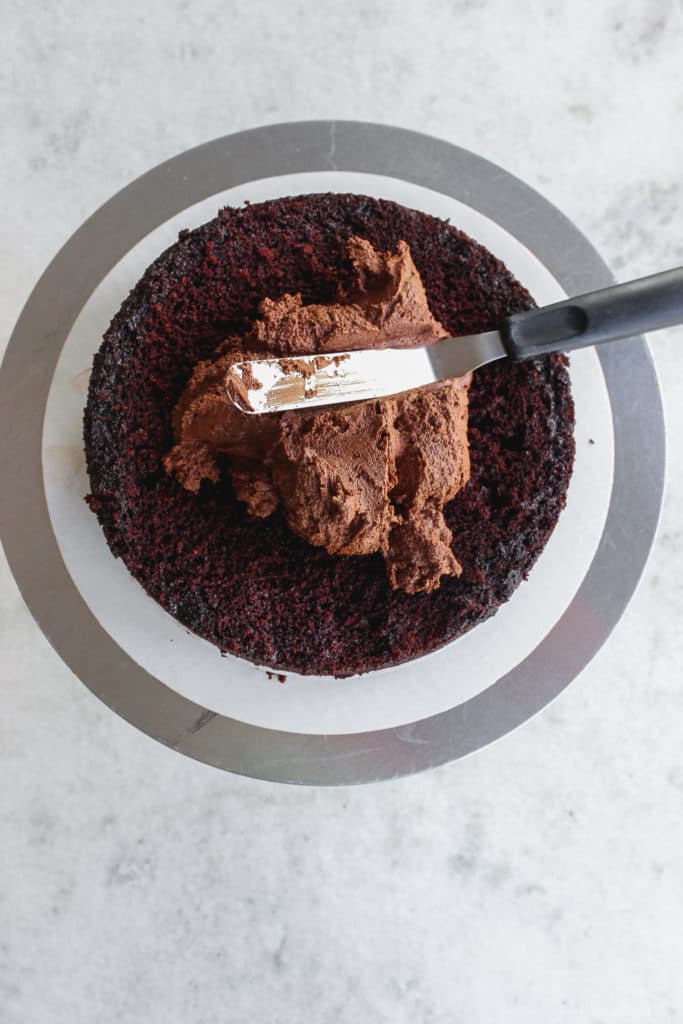
Scoop up some of the frosting, starting with possibly like 1/3 cup- eyeball it- and plop it into the middle of the block.
Using the spatula, or a knife if you don't take 1, work from the center of the cake to the outside, spreading it evenly all around, stopping about 1/2 inch from the edges.
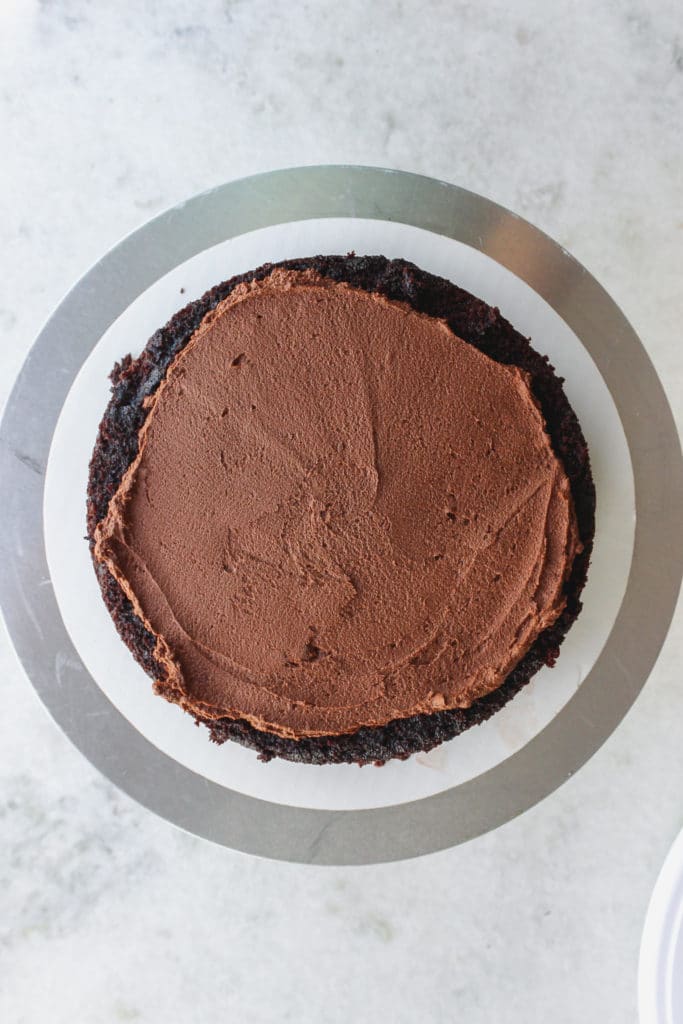
This will be filled in later when you practise the crumb coat.
Take your side by side cake layer- and this is crucial- turn it upside downwards, then that the lesser of the cake is now the meridian, and place it on peak of the frosting.
Doing this helps to create a more than even shape for the block overall. Repeat these final two steps with the adjacent layer.
P.South if you are using a block turn table, I practise all this on there, turning as I frost, simply if you don't take i, just practise information technology on whatever block stand that fits.
Now look at the stacked cake from middle level and come across if theres whatever unevenness to it. If there is, y'all can printing downward on the opposite side of the cake to endeavour to fifty-fifty it out, or carefully lift the border of the block where it is uneven and add together more buttercream to level it out.
Freeze
Now that you have a beautifully stacked cake, stick it in the freezer for xv minutes.
This will help to minimize the amount of crumbs that come up loose when you beginning icing it.
If you're using cake boards, this is where they help, otherwise move some things effectually so you tin can fit a massive block construction into your freezer.
Crumb Coat
A crumb glaze is substantially a lite coat of frosting over the cake done before the actual real buttercream coating to catch all the crumbs. This ensures that the top buttercream layer will be crumb complimentary and cute.
This role gets tricky if you lot don't have a turn table which is why I recommend it only you tin can still make information technology work.
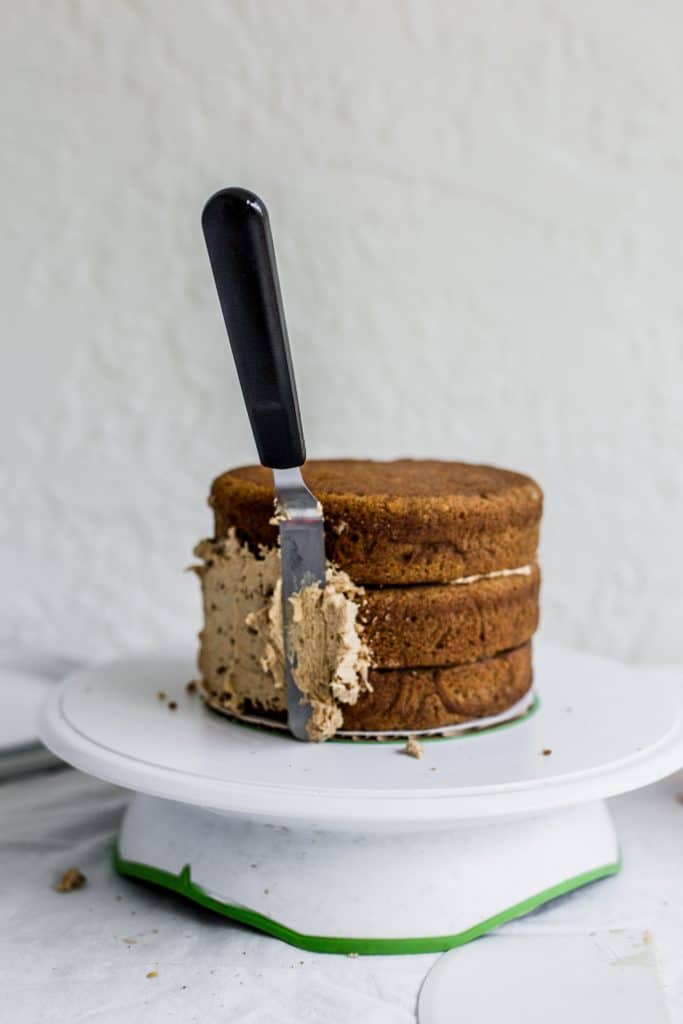
Using the back of your spatula, scoop up some frosting and smear it to the side of your cake, turning with the other manus equally you lot go (run into, tricky). Spread and coat evenly from the bottom to the superlative of the cake.
Make certain you scrape off the back of the spatula on another bowl or at the pinnacle of the buttercream bowl, then that you don't dip a crumb filled spatula into a crumb complimentary bowl of buttercream when you need another scoop.
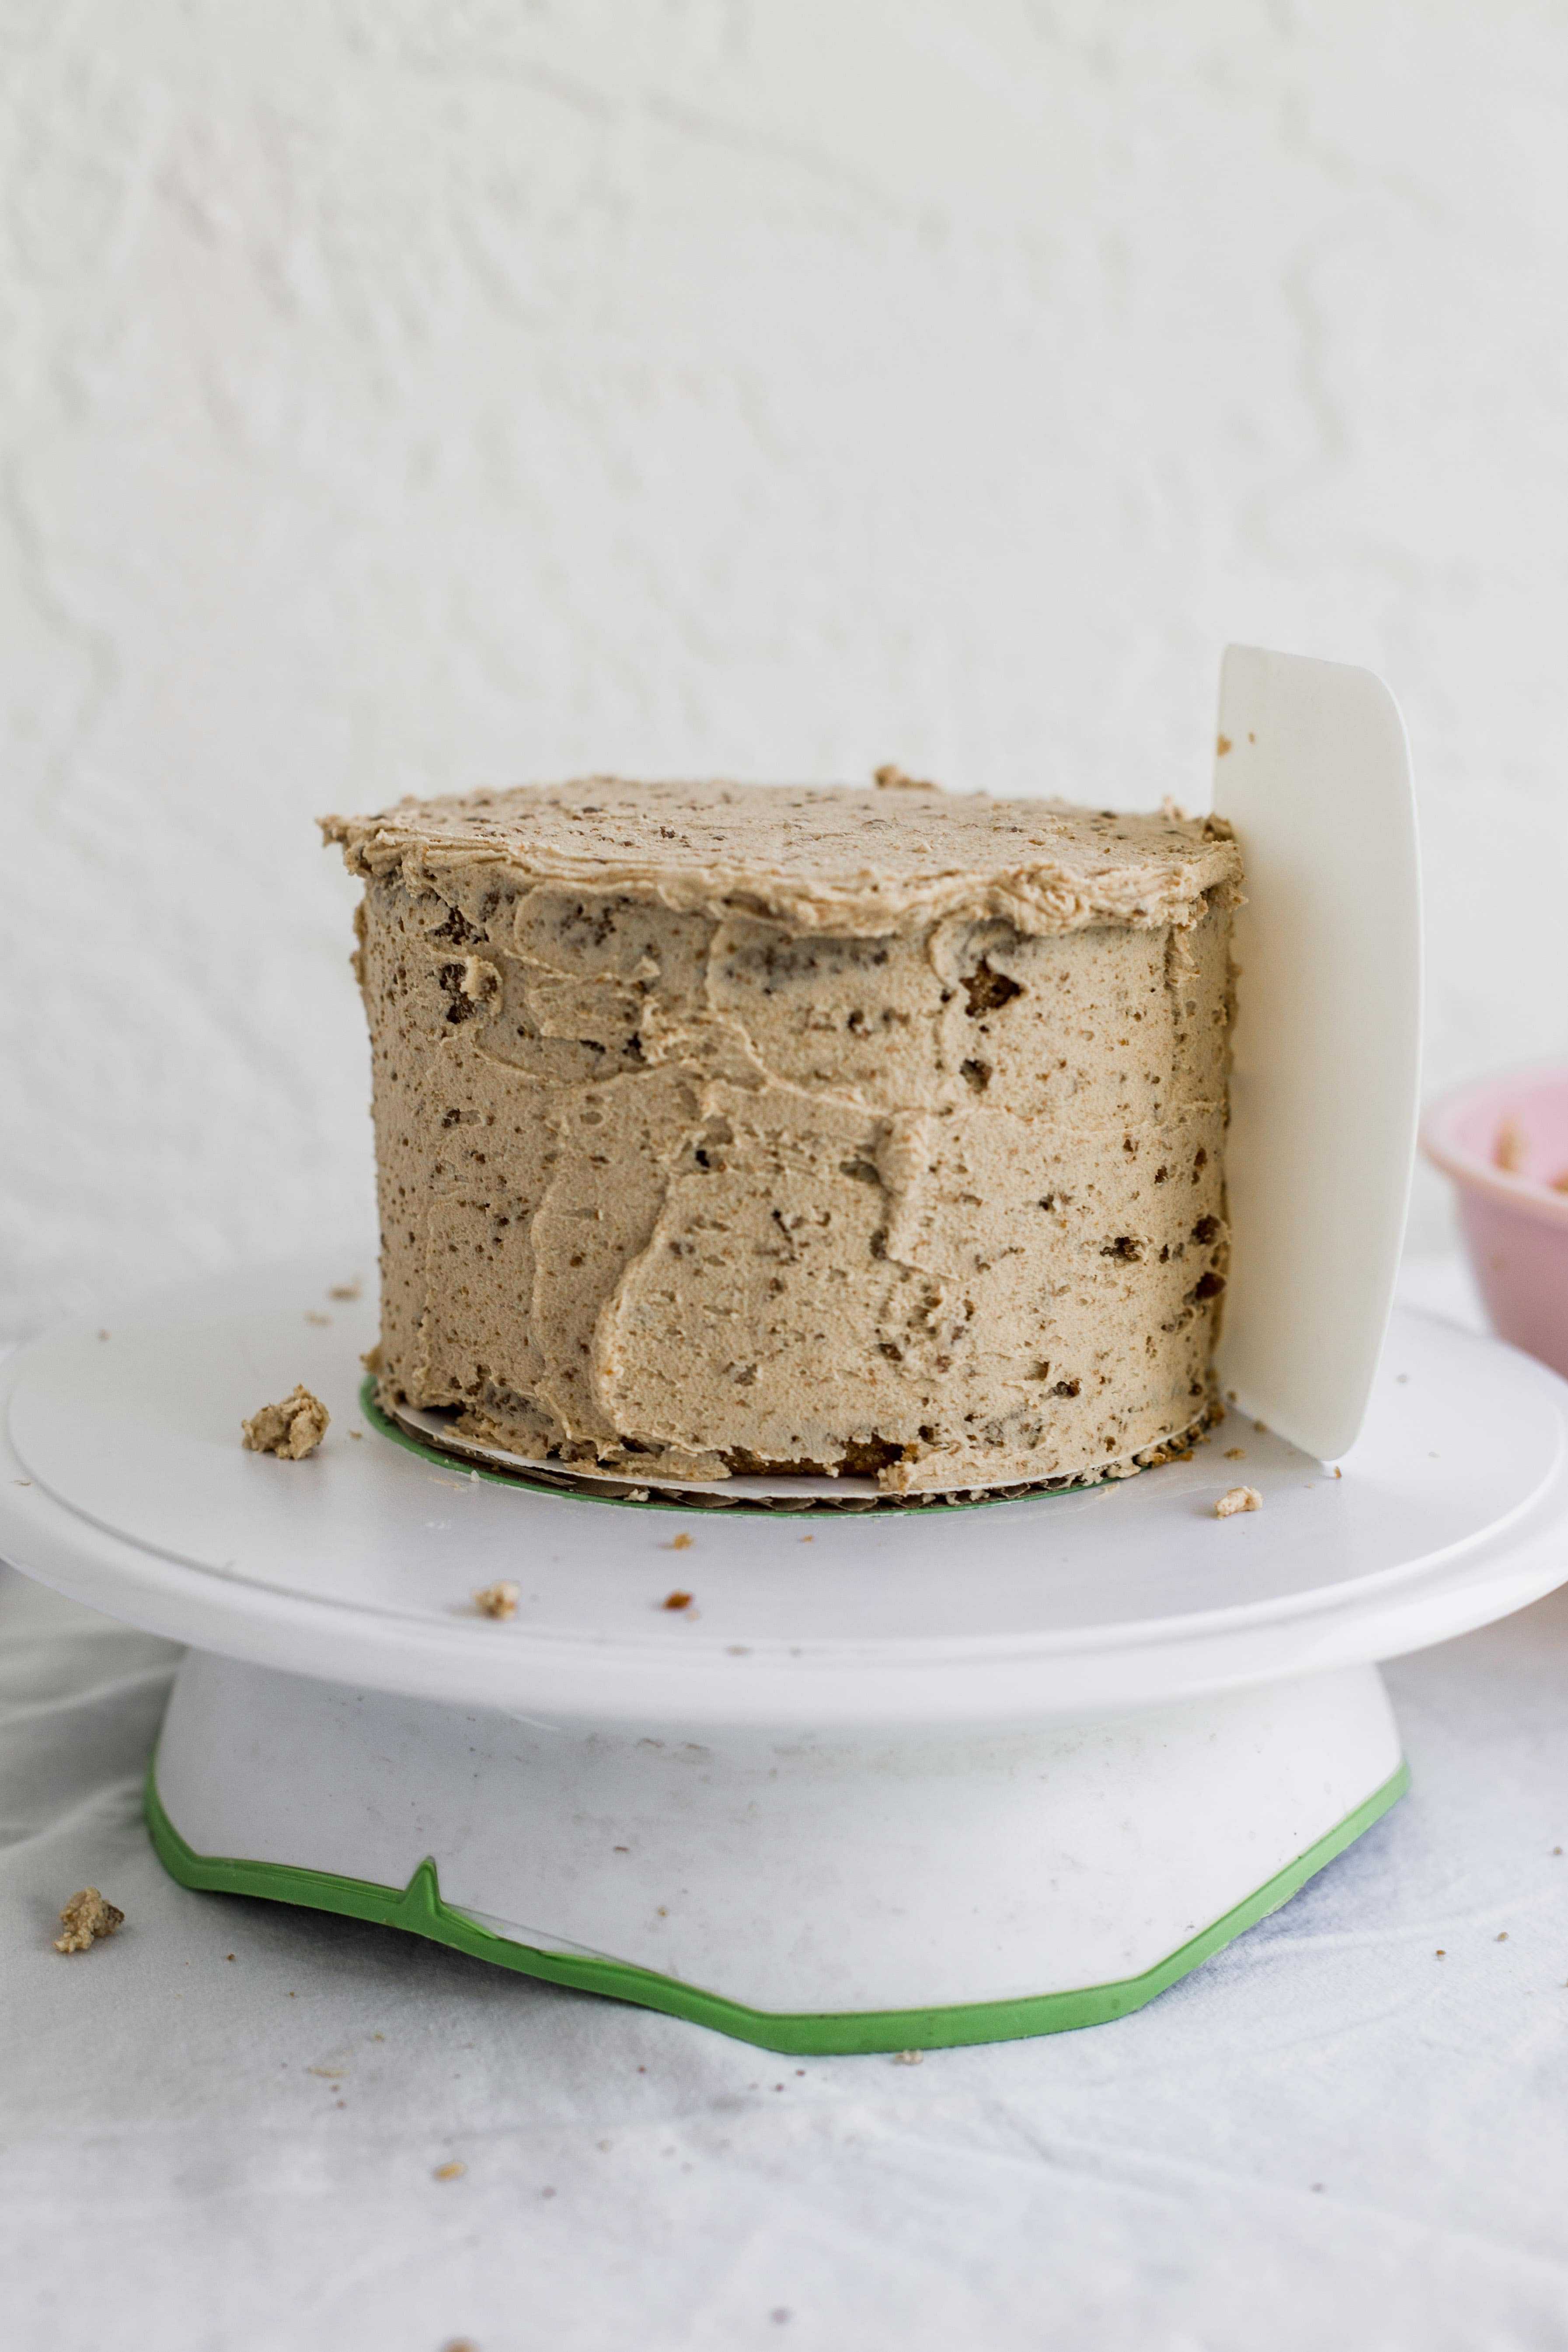
And then plop some icing on the top and utilize the spatula to even information technology out. Use your bench scraper to clean upward the sides. Agree information technology vertically, continuing on the cake board against the cake and spin the turntable to even it out.
It's fine if you can still run into the cake layers, really you just want to seal the crumbs.
Stick the cake back in the freezer for another 5 minutes.
How to frost a cake
You're doing the same matter as the above crumb glaze only with more than frosting, and this fourth dimension you want to completely cover up the cake layers. This is called your top coat.
- Showtime on the sides from the lesser and piece of work your way up with the spatula, going effectually and around, spinning and spreading every bit you frost.
- When the rest of the block is covered and you go up to the top, cease and switch from the spatula to the bench scraper to shine out the sides even more (not working on the top just yet).
- Making sure your wrist is direct, with the scraper leaning directly on the cake lath and the long side confronting the cake, spin the turntable.
- If you detect some places demand more than frosting, thats fine, just add in a niggling chip in those spots. Go along spinning with the demote scraper upwardly against the cake and information technology will even it out.
- Add frosting to the top and even out with the spatula leaving a minor gap betwixt the edges.
Straight edges
Now those edges might be giving you a problem because when y'all smooth the sides they stick up at the top. Then when yous polish the meridian, they do this weird thing over the sides.
Heres what you do- Airplane.
Shall I explain? Well of course.
First where you have the sides sticking upward over the border of the cake. Hold your spatula with a hand on each cease, then, (and this is how they explained it in culinary schoolhouse- legit-) go from the top over the edge from the outside of the cake to the heart. Glide your spatula over the edges equally if a aeroplane was coming in for landing.
I know it sounds weird. But, this swooping action works. You lot are keeping the spatula apartment and straight the whole time. You are only coming down onto the frosting on an angle and then landing and going straight onto the cake.
Cease when you lot get to the center and repeat over all the edges. At that place. Airplane.
Smoothing the cracks
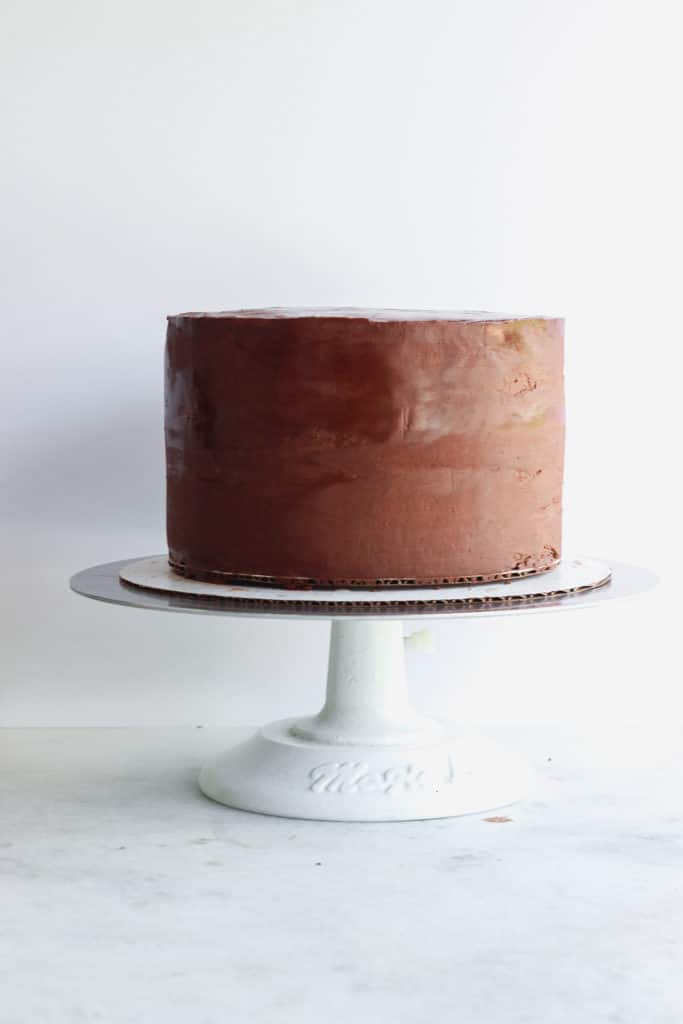 After y'all accept smoothed downwardly the edges, you lot might just need a little actress help to get those tricky cracks and annoying spots.
Insert spray bottle.
Fill up a spray bottle (THAT YOU Just Employ FOR Food) with clean water and spray. your. cake. Y'all heard me.
Spray that cute block that you merely obsessed over with water. Im non talking douse it. I mean spray lightly with water. Then immediately have your spatula and polish information technology over those difficult spots.
Instant fix.
Just a warning on this- you must use this play tricks at the terminal step before moving on to decorating. You can't utilize it and then determine your block needs more frosting and add together frosting on elevation. It will not turn out well.
This flim-flam should but be used at the very finish to smooth out the cake.
When I'chiliad working, at the terminate, I volition spray my cake lightly all around and then take my bench scraper and give it a good whirl to shine it all out.
Also, spray very lightly on cakes that accept nutrient coloring in the buttercream. Y'all don't want the color to drip and bleed downwardly the cake.
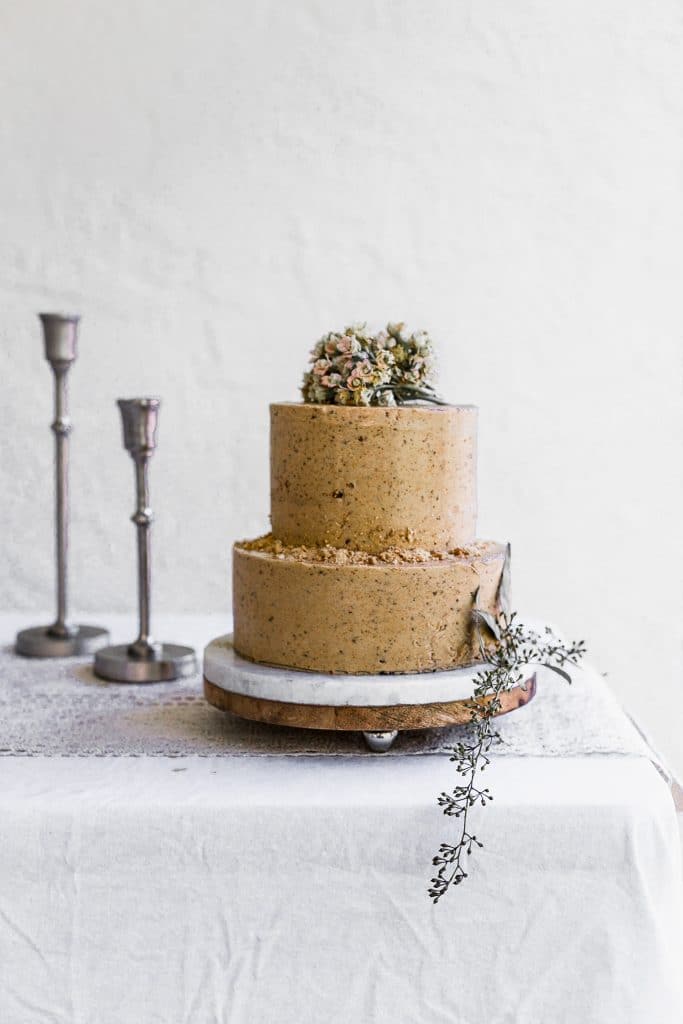
Cake decorating ideas
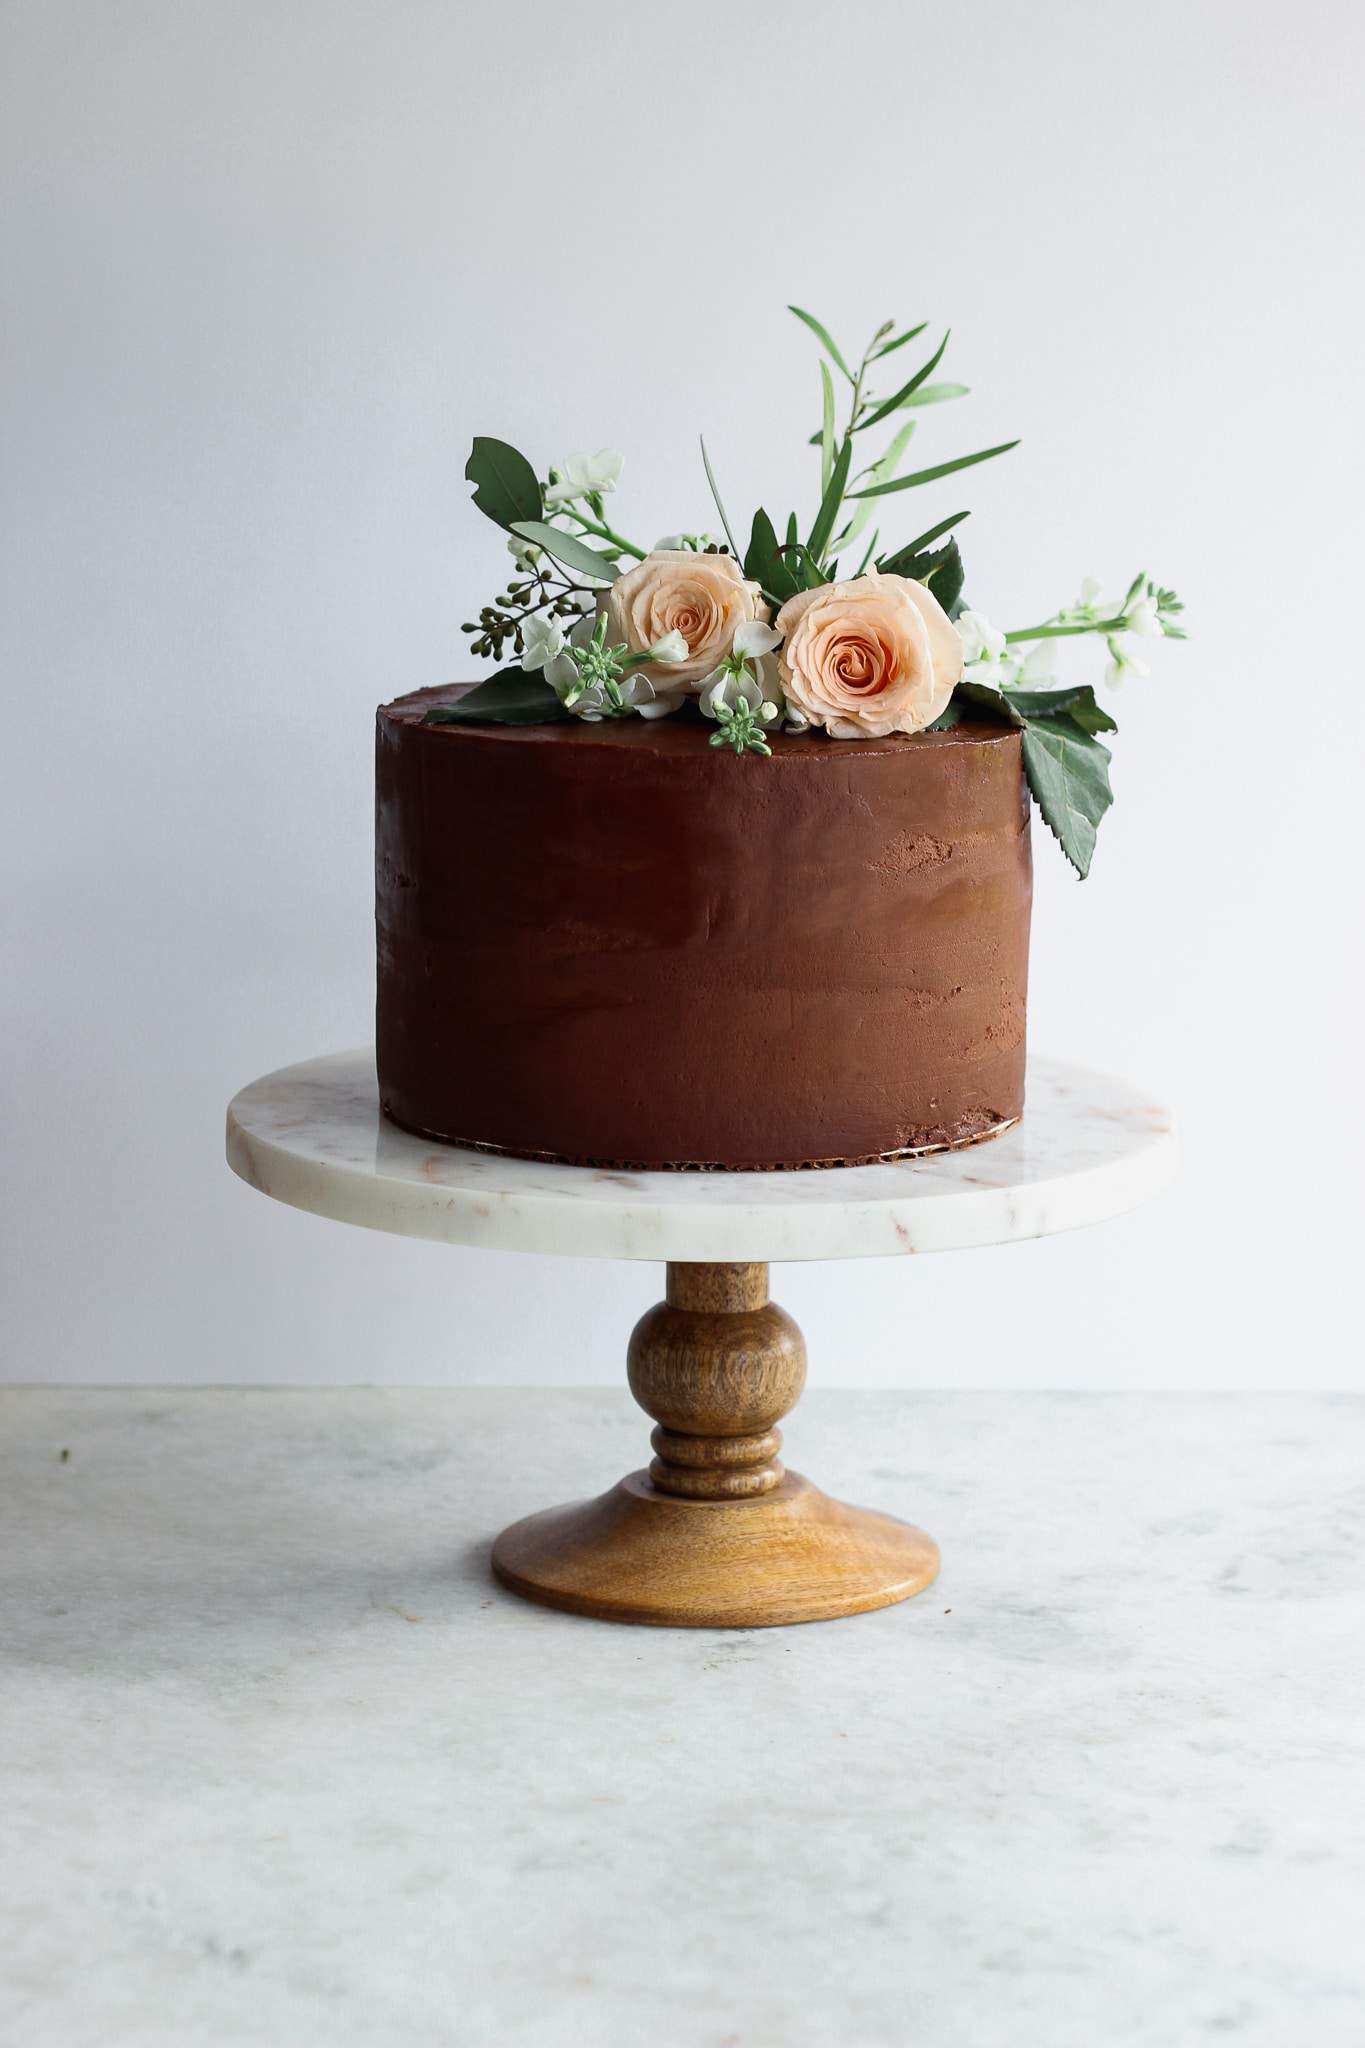
It'southward finally fourth dimension to decorate! Here are some of my get to block decorating ideas:
- Throw some sprinkles on top and on the sides. Aye literally throw them, they are sprinkles, who cares where they end upwards, it'll exist pretty because hellloooo its sprinkles! Side annotation- this needs to exist done correct later icing while the buttercream is notwithstanding sticky- if you expect for the buttercream to crust the sprinkles won't stick.
- Get a cake topper like this
- Edge the bottom office and/or sides of the cake with nuts, pretzels, candy,
- Top your cake with fresh flowers. Read my tutorial on how to do this safely hither!
- Sprinkle with fancy salt if its a chocolate or caramel cake.
- Top your cake with cookies in a fun pattern.
- Drizzle store bought or homemade sauces over cake.
Decorating without tools:
If you're reading this and proverb "but what if I dont have any of those tools y'all mentioned?"
You can:
- add frosting onto a cake using a flat regular spatula, a knife, or fifty-fifty the back of the spoon.
- frost equally best you can then run fork tines or the dorsum of a spoon over it to create a rustic design
- Comprehend it upwards with decorations.
Well there you have it!
In that location is definitely no right or wrong fashion to make and decorate cakes, this is merely how I do it.
Likewise remember not to exist too hard on yourself, usually the things we discover, noone ever else would, so have it piece of cake.
HAPPY CAKING EVERYONE!!
You lot might similar these decorating tutorials too:
- How to stack a ii tier block
- How to create the ultimate cookie souvenir box
- Pull apart football cupcake block
- How to decorate a cake with flowers
Save Save
Save Salve
Save Salve
This mail contains affiliate links. That means if y'all purchase something from ane of these links, I make a minor committee at no actress cost to you. Thank you for your assist in supporting my weblog!
How to frost and decorate a cake
Learn how to frost a cake with these 10 easy steps! Yes fifty-fifty if you are a beginner, you tin learn how to decorate a cake from start to finish like a pro!
Yield: ane cake
Cost: $25
-
Cake turn tabular array
-
bench scraper
-
Kickoff spatula
-
block boards
-
make clean spray bottle
- 3 layers Block whatever flavour
- 4 cups buttercream any flavor
- Cake decorations
Fill up and Stack
-
Level off the tops of a cake with a long serrated knife or a cake leveler. Smear a modest corporeality of buttercream on a block board that is two inches larger than your cake. Press a cake board that is the aforementioned size of your block on acme. Smear a pocket-sized amount of buttercream on that cake board and press the beginning cake layer downward. Place the whole matter on a cake turntable.
-
Fill up the cake layer with buttercream by placing about 1/4 cup in the middle of the cake and spreading outwards on the cake, using the offset spatula.
-
Have the adjacent cake layer and flip information technology over so that the top now become the lesser. Identify the cut side downwards next to the buttercream so that you now have a apartment top cake. Repeat the process of filling and stacking the side by side layer. Freeze for 15 minutes.
Crumb Coat
-
Using the back of your get-go spatula, scoop up about 1/4 cup buttercream and apply it to the sides of the block, starting from the lesser leading up to the top, spinning every bit you go to distribute the frosting every bit evenly as you lot tin can. Don't worry well-nigh it being perfect, information technology doesnt have to embrace the whole cake, its ok if some peeks through. Stick it dorsum in the freezer for another 5 minutes to seal in the crumbs.
Concluding Coat
-
This is the same step as a crumb coat, simply with more frosting. You want to completely encompass the cake and so none of the cake shows through. Repeat the process of calculation more than buttercream and spinning equally you lot go to add all effectually. Once the block is generally covered switch to a bench scraper to fifty-fifty it out as best yous tin. Add together more frosting equally you see fit.
Smoothing the Edges
-
Fill a clean food safe spray bottle with water and lightly spray your block. Shine out any cracks or bumps with your start spatula and demote scraper.
Decorate!
-
Decorate the cake with flowers, candy, sprinkles, a cake topper, or annihilation else y'all similar. The cake is a bare sheet and ready for annihilation!
This takes practice! Don't worry if it doesn't come up out perfect, it will get easier every fourth dimension yous do information technology.
Don't heavily spray your cake as information technology tin make the buttercream drip, all you lot demand is a light spray!

How To Make Professional Looking Cakes,
Source: https://frostingandfettuccine.com/10-ways-to-make-your-cakes-more-professional/
Posted by: stevensonhimed1937.blogspot.com
0 Response to "How To Make Professional Looking Cakes"
Post a Comment